Location Images
The Location Images screen allows users to view and manage images captured at various asset locations. By default, it shows the latest images captured at each location. When clicking on an image, it will display the images at the asset level. This screen is designed to enhance visibility and management of images, making it easier for users to access and utilize visual data effectively.
Layout
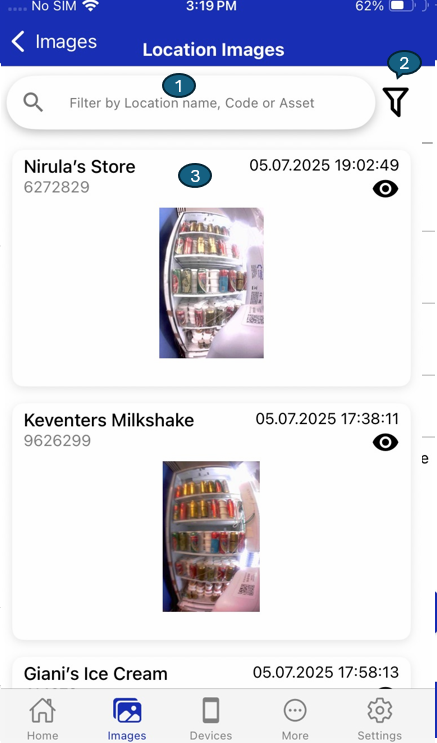
1. Search Bar

- Filter images by location name, code, or asset.
- Quickly find images related to specific locations.
2. Filter Icon & Options
This feature enables advanced filtering of images, allowing users to narrow down results based on specific criteria. By tapping the filter icon, users can access options to filter images by the date they were last captured, market or region, and location classification. This helps users quickly find relevant images, improving efficiency when managing large sets of location-based images.

| # | Option | Description |
|---|---|---|
| 1 | Select Last Image Date | Choose a specific date to display images captured on or after that day. Helps focus on recent or relevant image data. |
| 2 | Select Market | Pick a market or region to filter images from specific geographic areas. Useful for regional analysis and management. |
| 3 | Select Location Classification | Filter images by location type or classification (e.g., Retail, Warehouse). Helps view images by location category. |
| 4 | Apply | Apply the selected filters to refresh and update the image list. Ensures only relevant images are shown. |
| 5 | Close | Exit the filter panel without saving changes. Keeps the current filters intact. |
| 6 | Reset | Clear all selected filters and revert to default view. Displays the complete, unfiltered image list. |
3. Image List
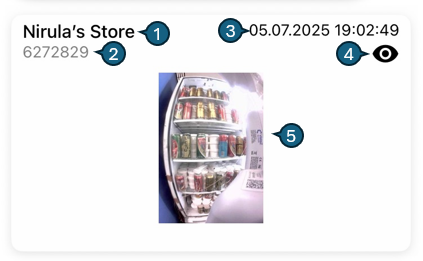
Each entry in the image list displays key information and provides interactive options:
1. Location Name:
- Shows the name of the location where the image was captured.
2. Location Code:
- Displays the unique code associated with the location.
- Location Code (e.g., 6272829)
3. Provision Image:
- Shows the provision image date and time.
4. Preview Icon:
- Tap to view the image in full screen.
5. Tapping on Image:
When you tap on the image or the preview icon in the image list, a detailed image viewer opens as shown below:
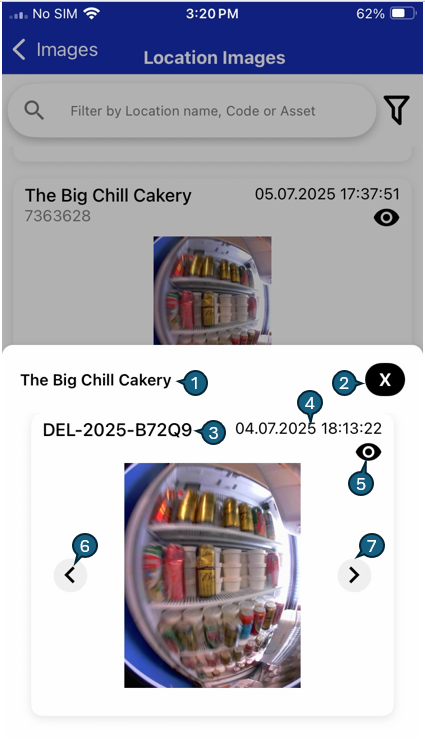
1. Location Name:
Displayed at the top (e.g., The Big Chill Cakery), indicating where the image was captured.
2. Close Button:
Tap the "X" icon to exit the image viewer and return to the image list.
3. Asset Serial Number:
Shows the asset serial number (e.g., DEL-2025-B72Q9).
4. Timestamp:
Displays the date and time the image was provisioned.
5. Image Preview:
Shows a large, clear version of the selected image for better inspection.
6. Left Arrow:
Tap to view the previous image in the list, allowing easy navigation through multiple images associated with the same asset or location.
7. Right Arrow:
Tap to view the next image in the list, facilitating smooth transitions between images.