Battery Replacement and Charging Guide
This guide provides step-by-step instructions for safely replacing and charging batteries in your smart devices.
Battery rotation helps ensure consistent device performance. In case of battery discharge, remove the used batteries, insert fully charged replacements, and recharge the used ones for reuse—either in the same or other compatible smart devices.
This process is especially useful during seasonal transitions, such as when moving from off-season to on-season (e.g., returning cabinets from warehouse to retail outlets). Before the start of the on-season, clients are encouraged to fully charge all smart devices to ensure uninterrupted functionality.
What's included in the initial shipment:
Battery Recoupe Pack with a spare set of 20 batteries.
Tools required
- ESD gloves (recommended)
- Plastic pry tools
- Philips #00 or PH00 M4 screwdriver
- VistaZ to troubleshoot
- Spare charged battery (if replacing the battery)
Replacement Steps
Open the Battery Lid
- Locate the four screws on the battery lid.
- Use a screwdriver to open the screws.
- Carefully remove the battery lid.
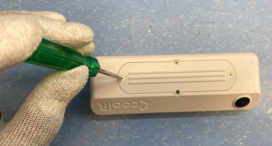
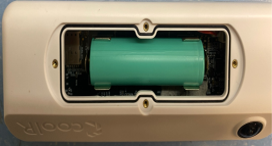
Image showing the location of the screws and the removed battery lid.
Remove the Battery
- Use a plastic pry tool to gently disconnect the battery.
- Carefully lift the battery out of its compartment.
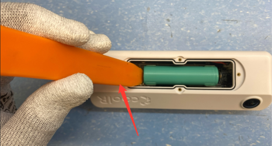
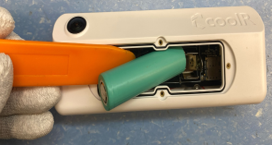
Images demonstrating how to use the plastic pry tool to remove the battery.
Charge the Battery
- Use a compatible charger (as shown below) to charge the battery.
- Charge the battery until it reaches 3.85V or more. See further details in the Precautions section.
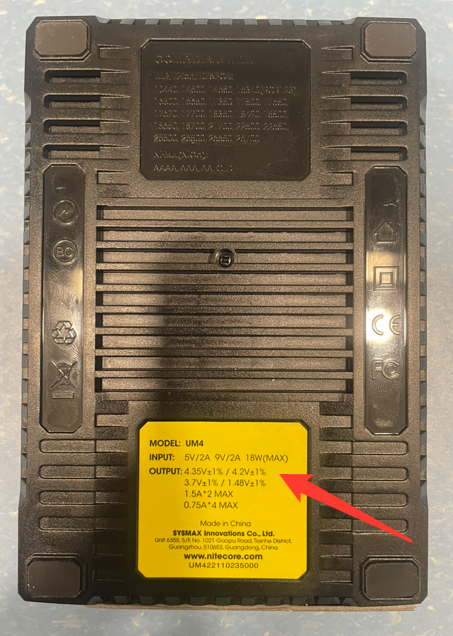
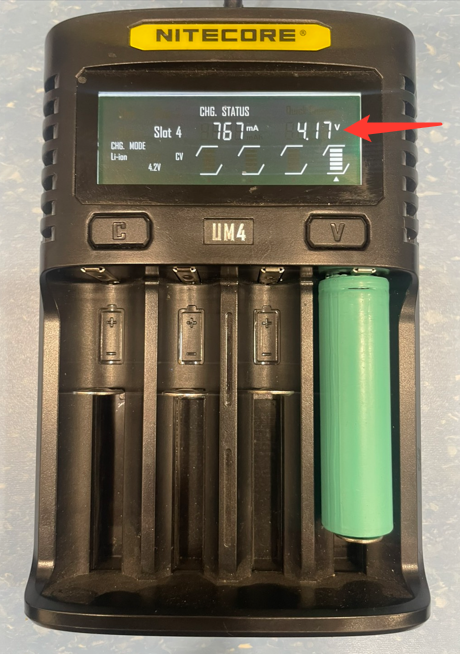
Images showing the charger and the battery being charged.
Reinstall the Battery
- Before placing the battery back, ensure the polarity is correct.
- Match the battery polarity with the markings on the PCB.
- Gently insert the battery into its compartment and make sure it is securely in place.
- Screw back all the screws to secure the battery lid.
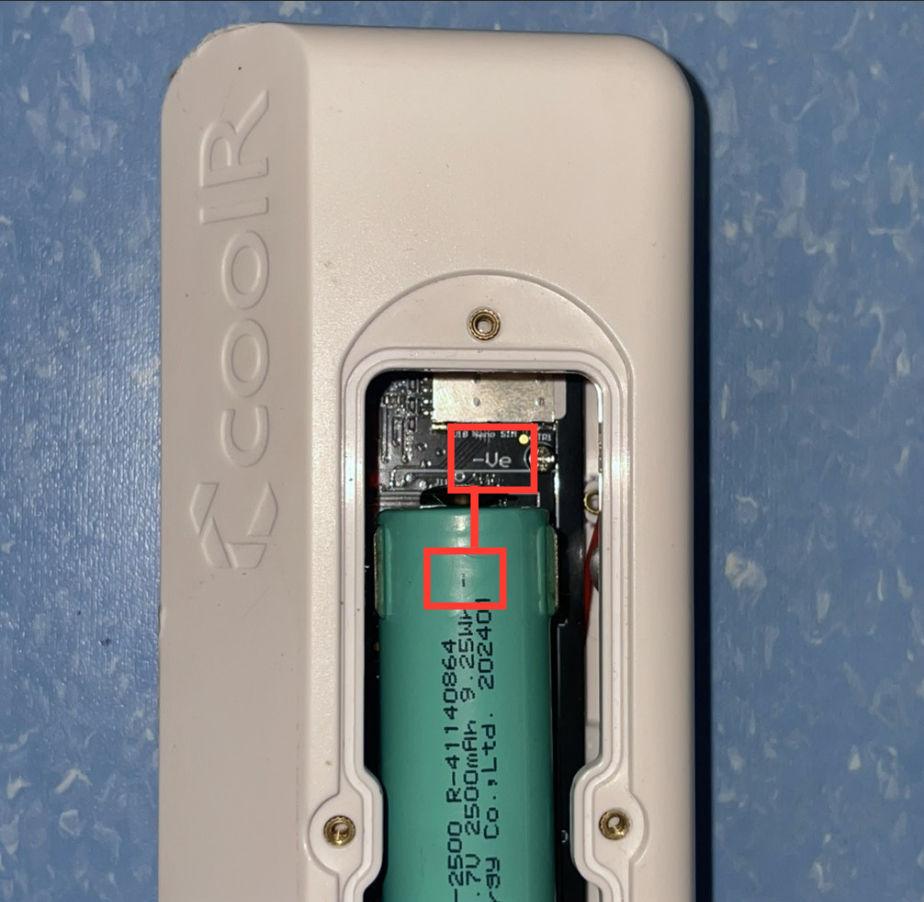

Images showing the correct polarity alignment and the final reassembled device.
Battery Replacement Tutorial link - Battery Replacement Tutorial
Battery Dislodge (Re-seating the Battery)
In some cases, the battery may get dislodged due to vibration, handling, or transit, even though it is not discharged. In such scenarios, battery replacement is not required—only proper re-seating of the battery is needed.
When to Use This Process
- Device is not powering on
- Device intermittently disconnects
- Battery appears physically loose
- No visible battery damage
Battery Dislodge Fix – Steps
-
Unscrew the Battery Lid
- Locate and unscrew the four screws on the back of the device.
- Carefully remove the battery lid.
-
Remove the Battery
- Gently take out the battery from the compartment.
-
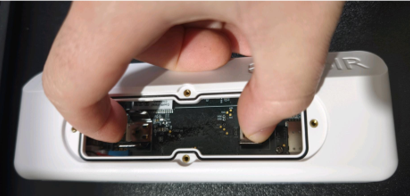
Squeeze the Battery Clamps
- Using your fingers, gently squeeze the metal clamps together to tighten the battery contact.
- Ensure the clamps are firm enough to hold the battery securely (do not over-bend).
-
Reinsert the Battery
- Place the same battery back into the compartment.
- Make sure it sits firmly and does not move.
-
Verify Battery Polarity
-
Confirm correct alignment:
- Negative (–) to Negative (–)
- Positive (+) to Positive (+)
-
Incorrect polarity may prevent the device from powering on.
-
-
Close the Battery Lid
- Reattach the battery lid.
- Tighten all four screws securely.
Important Notes
- This process is meant only for battery dislodge issues, not low battery or damaged battery cases.
- If the issue persists after re-seating, proceed with the Battery Replacement steps described above.
- Avoid using sharp or metal tools while adjusting battery clamps.
Precautions
- Always use a plastic pry tool to avoid damaging the battery or device.
- Double-check the polarity to prevent any short circuits.
- Ensure all screws are tightly secured after reassembly.
- During air travel: battery should not be charged above 70%
- If battery is 2500 mAh: 3.85V
- If battery is 3000 mAh: 4.0V
- If no air travel: full charge - 4.2V