
Appearance
Image
The Camera Installation screen is the third step in the installation wizard. On this screen, users confirm the asset type, assign the selected camera, and take a photo of the installed asset.
Layout
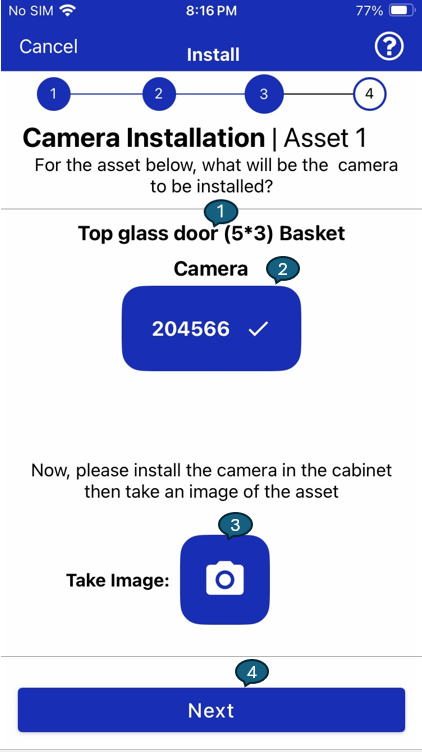
1. Asset Type Display
Displays the description or type of the asset (e.g., Top glass door (5*3) Basket) for which the camera is being installed. This helps the installer verify the asset visually and contextually.
2. Assigned Camera
Shows the serial number of the camera previously selected or scanned. This confirms the specific camera being assigned to the asset.
3. Take Image Button
Launches the device camera, allowing the installer to take a photo of the installed camera setup. This image is used for record-keeping and verification.
4 . Next Button
Once the camera is installed and the image is captured, the Next button advances the user to the final step.
Functional Behavior
- The installer is prompted to mount the camera inside the asset and then take an image.
- The captured image is stored and associated with the installation session.
- The Next button becomes active once the camera assignment and image capture are completed.